Winter makes me tired, slow, unhappy, depressed, irritable, and sloth-like. All I want to do is to curl up in bed with a heating pad on my freezing cold feet, read a good book or watch some good TV, and eat cookies (or raw cookie dough or cake or candy). I force myself to get up and go to work so I won't get fired, and I try all of the fixes that people suggest for seasonal issues: vitamin D, light boxes, massage, more exercise, etc etc etc (but not colon cleanses). So far nothing has worked, and like pretty much everything else in my life, this blog doesn't get touched.
And then last week the weather got better. There is sunlight. It's not snowing. I can wear sandals outdoors, I can ride my bike to run errands, I don't have to wear a winter coat with snow boots and earmuffs. All of a sudden I want to go out with friends or do some exercise.
So obviously I need to move to a city that doesn't really have winter. I hated living in Los Angeles but I never got the winter blues in the eight years I was there. Although it's going to take a while to get the social part of my life back together, the current result is that I'm baking for three potlucks this week. This blog is about to get a whole bunch of posts in a short amount of time, especially since the draft from January is already halfway done.
For yesterday's potluck, I made a blackberry cobbler and a chocolate cherry tart. The cobbler is a recipe that I've made before and it's very reliable, while the tart was an experiment with a new recipe. I chose these two recipes for several reasons. One, if I want to try a new recipe and I'm going to a potluck, I make a reliable recipe as well in case the experiment fails. You don't want to show up to a potluck with nothing but excuses about how the dough didn't come together right or the filling never solidified. Two, one of my friends really doesn't like chocolate and I figured he would enjoy having a chocolate-free dessert option. Although I didn't plan it this way, both recipes have something in common: blind baking/parbaking.
Blind baking and parbaking are different applications of the same idea. When you want to bake a recipe where the different parts need to bake for different amounts of time, you bake each bit separately at first and then combine them for a final bake. Although this sounds complicated, it is usually easier and more time-manageable than it seems because you can mix together the second part of the recipe while the first one is being blind or parbaked.
Cobblers are a fruit filling with some type of dough topping, usually biscuits or pie dough. According to the almighty wikipedia, cobblers are an American invention to use less butter than some of the traditional English desserts. Basically, if you don't put a layer of dough on the bottom of the pan but only on the top, you use half as much dough, which mean half as much butter, flour, etc. We have many different types of cobblers over here but I like the good old-fashioned blueberry or blackberry cobblers.
Supposedly cobblers are called that because the top of a cobbler looks like a cobblestone-paved street. That's an explanation I can take or leave, especially since nobody I've ever talked to has known of a reason why cobblers are named cobblers. In any case, cobblers can be tricky if the timing isn't worked out exactly right because you can end up with a soggy, over cooked top and a half-cooked filling. Fortunately, America's Test Kitchen has worked out a good cobbler recipe with parbaking that uses buttermilk biscuits for the topping. I've made this recipe several times and it's worked nearly-perfectly each time.
The chocolate cherry tart has a lot more steps than the cobbler and turned out to be a bit finicky, but it could also be a non-time-intensive recipe if you don't do it all in one day. The crust for the tart needs to be refrigerated, then rolled and put into the tart pan, and then refrigerated again. It then needs to be blind baked, because the tart dough takes a lot longer to bake than the filling.
Blind baking is a specific term that refers to needing to bake a dough shell for either longer than the filling or because the filling isn't baked at all. You fill the raw shell with some kind of weights to keep it from rising upwards as it bakes, then take it out of the oven, remove the weights, put the filling in it, and (if needed) finish baking it. This is the standard approach for most tarts, especially since many tarts have a filling that is never baked.
 |
| The tart shell has been baked but the custard was cooked in a pot and poured in, and the strawberries aren't cooked at all and just have a glaze applied to them. Picture from Food Network recipe. |
The chocolate cherry tart has a blind baked shell, then the chocolate mixture is poured in and baked, and then the cherries are placed on top. I fooled around with a proportions a little bit (used a lot more cherries and whipped cream) but most people said that they liked it. One friend doesn't like cherries so she didn't like it, but since she is married to the guy who doesn't like chocolate I never intended for them to eat the tart.
Tips for the cobbler: I blogged about the cobbler recipe before. These are just some extra tips and some photos from this time for extra info.
Just follow the instructions the first time you make this recipe. It will work, I promise you. I ended up baking everything on the longer side because the oven in this house is pretty crappy but if your oven is better it may take 5 to 10 minutes less.
If you don't have enough fresh berries, you can use frozen ones instead. This time, I used 4 cups of fresh blackberries and 2 cups of frozen blackberries from Trader Joe's. Last time, I used 6 cups of fresh blackberries. I didn't notice any difference, but there is a noticeable difference between using all or mostly fresh berries and using all frozen berries (fresh is better!).
When making the biscuits, the butter is supposed to curdle in the buttermilk. It will make clumps and look kind of like somebody poured really pulpy orange juice into a glass of milk. If you get this result, it means you've done it right. Make sure that the butter is all the way melted and that the buttermilk is cooled from the fridge. You need the temperature difference to help with the curdling.
Be sure to cover everything with tin foil when parbaking the berries and baking the cobbler. You do not want to get sticky berry juice in a 400 degree oven. I hit my hand on the rack and dropped the cobbler when I was taking it out, but fortunately most of the juice landed on the tin foil and I managed to save the cobbler and clean up the oven. Don't be like me. Slide the oven rack all the way out so the dish is sitting outside of the oven but still on the cookie sheet, take the foil off to check if the berries done parbaking, and put the biscuits on top if it's time. Then slide the rack back in to the oven.
The recipe website also has pictures if you want to see what it looks like when somebody who knows what they're doing makes it.
Tips for the tart: This recipe is a bit time and labor intensive to make all in one day because of the 2+ hours of fridge time needed for the dough. The good news is that the dough can be refrigerated for up to a day, so you can make the dough on day 1, roll it out on day 2, and bake the tart on day 3.
You will need either a Cuisinart-type food mixer or a bake-stand-type food mixer to make this dough. You can do it by hand but it will take hours (seriously, I'm not kidding about this). If you don't have one, borrow one. If you do decide to make this dough by hand, be sure to ice your wrists and hands afterwards. No, I'm not exaggerating.
When you pour the liquid into the dough to bind it together, you will need to mix it for longer than "pulses". I just turned my Cuisinart on and it had to run for about 2 minutes for the dough to come together. The dough will start clumping in little bits first, so you will hear a thumping noise before you see it clump. Once you hear the thumping noise, the dough should come together completely in the next minute.
The dough recipe calls for pastry flour but all-purpose works fine. Don't skip the two refrigeration steps or the dough will not bake correctly.
When making the dough, you do need to chop the butter up into smaller pieces. This will help it be incorporated into the flour in the mixer.
To roll out the dough without it sticking to whatever you're rolling it on, put the dough between two large sheet of parchment paper and roll it in between the sheets. Make sure that there aren't any big wrinkles in the sheets. When the dough is rolled out to the correct size, peel off one piece of parchment paper and place the dough in the tart pan. Then peel the other piece off and push the dough into the sides of the pan. Roll the rolling pin around the top edge of the tart pan to cut off the excess dough. You can use the extra dough to fill in any holes or gaps before baking the shell.
To blind bake the dough, put a piece of tin
foil or parchment paper on top of the dough in the tart pan so that the
sides are covered. Fill the foil or paper with some kind of little
weights (I use pinto beans). Make sure the weights press on the sides
as well as the bottom. This will help to keep the sides from sliding
down the sides of the tart pan as the butter in the dough melts. The
weights will be very hot when you take the tart shell out of the oven,
so have a plate near the oven so that you can put the weights on it to
cool off. Don't try to put them away while they're hot.
The recipe calls for bittersweet chocolate
in the filling. I used half bittersweet and half semi-sweet and it
still tasted bitter to me. I hate dark chocolate so my guess is that
this ratio of chocolate probably tastes good to most people. The
chocolate filling has a really nice moist-but-not-dense texture. I also
added some almond extract in with the chocolate when I poured the cream
over it instead of putting the almond extract in the whipped cream. I
thought that I was going to use the whipped cream for the tart and the
cobbler but there wasn't enough. The almond taste will come out more if
you put the almond extract in the whipped cream instead of the
chocolate.
I used twice as many cherries as the recipe calls for, so that the entire top was covered with cherries instead of just sprinkled with them. You will get a lot of cherries per mouthful of tart with this approach so only do it if you really like cherries. I used one and half jars of Trader Joe's Dark Morello Cherries. (This is a great product. If you've got a Trader Joe's nearby, try these sometime.)
I also put a cherry glaze on top of the cherries and put the tart in the fridge overnight to set the glaze. I made the glaze from the juice that was in the jars of cherries. If you're using fresh cherries, you probably want to skip this step. To make the glaze, put half a packet of gelatine in half a cup of liquor or water. I used Bacardi Gold rum. Let the gelatine bloom for five minutes. Heat some of the cherry juice in a pan and add the rum and bloomed gelatine. Let the mixture cook for a couple of minutes to heat the gelatine and stir it to mix it up. Then pour the cherry juice mixture on top of the tart and put it in the fridge overnight to set. You want to use only enough cherry juice to cover the top of the cherries on the tart in a thin layer.
Dark Chocolate, Cherry, and Almond Whipped Cream Tart
Originally from Sunset Magazine (July 2010), found at My Recipes
Ingredients
Crust
1 cup plus 2 tbsp. pastry or all-purpose flour
1/2 cup powdered sugar
1/4 teaspoon salt
7 tablespoons unsalted butter, cut into 1/2-in. cubes
1 piece (1 in.) vanilla bean
1 large egg yolk mixed with 1 1/2 tsp. milk
Filling
7 ounces top-quality bittersweet chocolate, finely chopped
3/4 cup whipping cream
1/3 cup half-and-half
1 large egg
Topping
3/4 pound pitted cherries, preferably tart
2 to 5 tbsp. organic granulated sugar
1/2 cup whipping cream
3/4 teaspoon almond extract or 1 1/2 tsp. amaretto
Preparation
Make crust: Pulse flour, powdered sugar, and salt in a food processor to blend. Add butter and pulse a few times until dough looks like cornmeal. Slit vanilla bean and carefully scrape out seeds with a spoon; add to dough. Drizzle in egg mixture and pulse until dough comes together.
Flatten dough into a disc and chill, wrapped in plastic wrap, at least 1 hour and up to 2 days.
Roll dough on a lightly floured surface with a lightly floured rolling pin into a 10 1/2-in. circle. Ease dough into a 9-in. tart pan and, using your thumb, press into sides and bottom corner; fold edges over to help form rim. Line shell with parchment paper and fill completely with dried beans or pie weights. Chill at least 1 hour and up to 1 day.
Preheat oven to 325° F. Bake shell 15 to 25 minutes, or until lightly golden on the edge and set on the bottom (lift up parchment to check). Carefully remove parchment and weights and bake shell until pale golden, 5 to 10 minutes more. Transfer tart shell to a rack, and lower oven temperature to 250° F.
Make filling: Put chocolate in a medium heatproof bowl. Heat cream and half-and-half in a medium saucepan over medium heat until simmering, then pour over chocolate. Let sit a few minutes, then stir gently until smooth.
Break egg into a separate medium bowl, then pour into chocolate mixture, whisking constantly until incorporated (keep whisk in contact with bottom of bowl so as not to whip in air bubbles). Pour mixture into the tart shell and bake until just set (no longer jiggles), 25 to 35 minutes. Let cool completely.
Make topping: Warm cherries in a saucepan over low heat with granulated sugar to taste until sugar melts. Whip cream with 2 tbsp. sugar and almond extract until soft peaks form.
Cut tart into slices and serve each with a few cherries and a dollop of cream on top.
Make ahead: Up to 2 days, chilled (bring to room temperature before serving).
Cobbler:
 |
| The butter curdled in the buttermilk. It is supposed to look like this! |
 |
| Biscuits ready to parbake. |
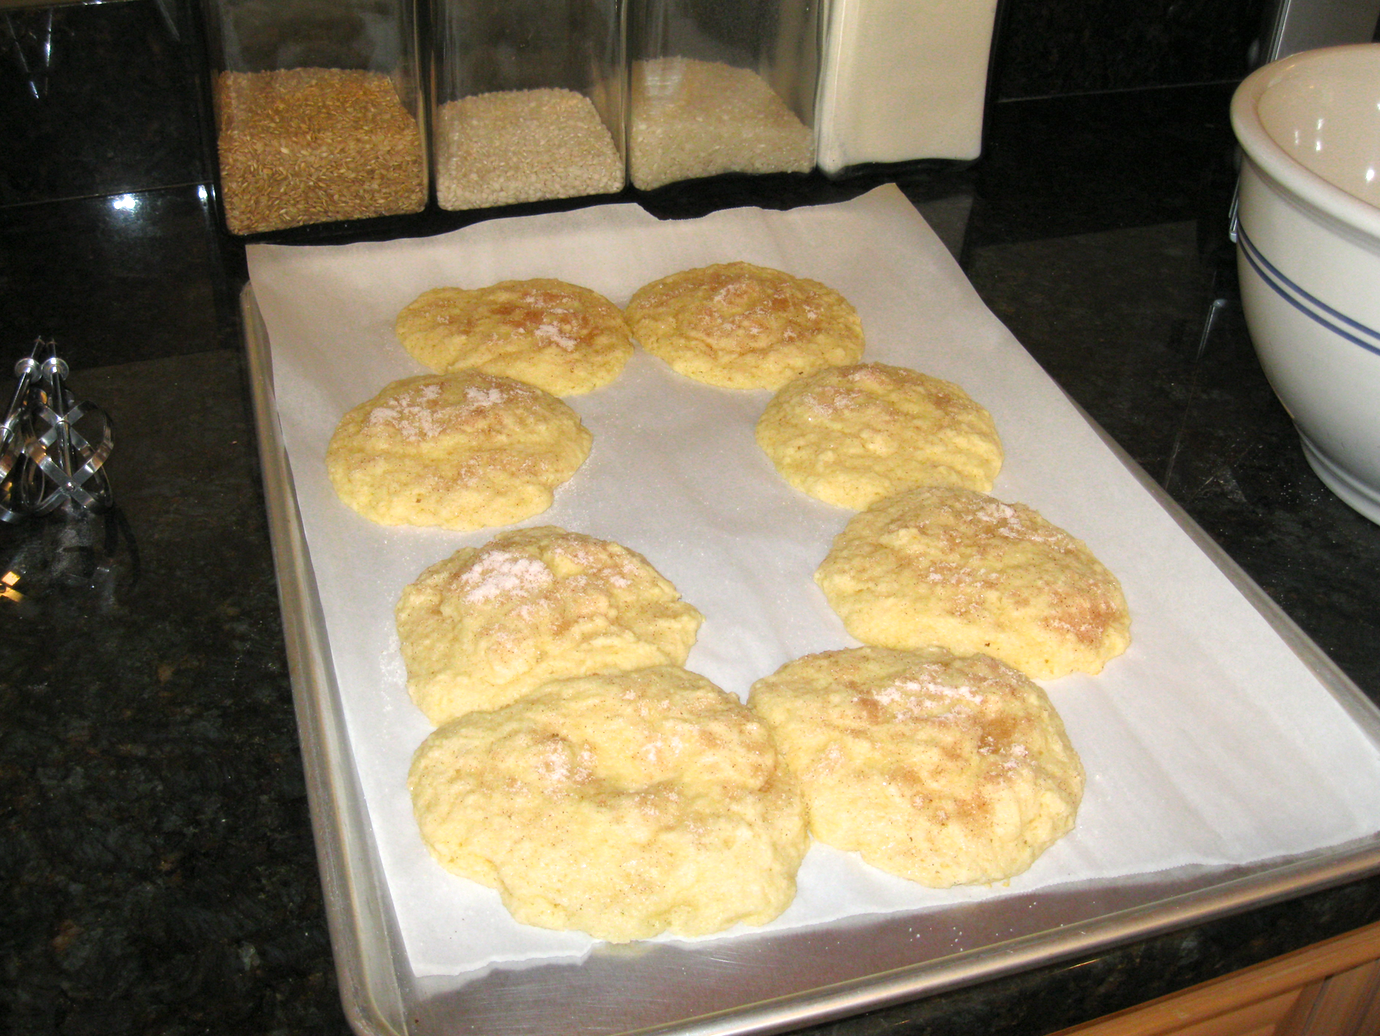 |
| Parbaked biscuits. They usually rise more than this. I used the last of my baking powder on these so it may have been so old that it had lost its mojo. |
 |
| Berries ready to parbake. |
 |
| Parbaked berries, except that I dropped them taking them out of the oven. This is why you use tin foil on everything. |
 |
| Only 5 biscuits fit on top instead of 8. I ripped one biscuit in half and used it to fill in the center and the lower-right. When the cobbler is baking, the biscuits swell up and by the end nobody will be able to tell that the biscuits have been torn. |
 |
| Finished cobbler. |
 |
| Diced butter with flour and sugar. |
 |
| Butter chopped up with flour and sugar. You want the butter to be in small chunks. |
 |
| The dough has come together with the egg and milk. |
 |
| Dough ready for the fridge. The flash is making it look neon but in reality it's a light color, like butter. |
 |
| First sheet of parchment paper for rolling the dough. |
 |
| Second sheet of parchment paper for rolling the dough. |
 |
| Rolled dough. I wasn't careful with the paper so there are some wrinkles. You want the paper to be flat instead. |
 |
| Dough fitted into the pan for refrigeration. Roll the rolling pin around the top of the tart pan to make the smooth top. |
 |
| Ready for blind baking. You need a lot of weights to keep the bottom and sides covered. Always blind bake with something between the weights and the dough or the weights will bake into the dough and you'll never get them out again. |
 |
| The weights after baking, cooling off. |
 |
| Getting ready to smash the chocolate. |
 |
| The results: chopped chocolate without chopping. |
 |
| Mixing up the egg while the hot cream melts the chocolate. |
 |
| With the egg whisked in. |
 |
| Ready to bake the chocolate. You can see that some of the edges of the tart shell slid down while it was blind baking. |
 |
| Baked shell and chocolate filling with the cherries. |
 |
| Cooking up the cherry glaze. |
 |
| With the hot cherry glaze poured over. |
 |
| Putting the tart in the fridge. Patches decided that this meant that he deserved a treat, and he tried to hop up onto the shelf with the tart. He did not get a treat. |
 |
| The next day, when the cherry glaze had set, with some whipped cream. |
No comments:
Post a Comment